Colorado State University

How to Use
Sun Java WorkShop 2.0

Written by CJCSchauble and SKandukuri


What is the Sun Java WorkShop 2.0?

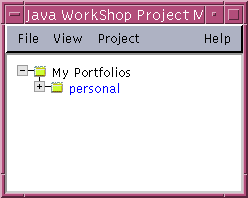
The Java WorkShop 2.0 is a substantially revised and improved version of Java WorkShop 1.0, a powerful environment created by Sun Microsystems, Inc. for developing Java programs. It includes the facilities to edit, compile, execute, and debug Java programs.

It can be intalled on PCs running Windows 95, Windows 98, and Windows NT, as well as Sun UNIX workstations running Solaris. At CSU, it has been installed on most of the Solaris machines in the 3rd floor labs, as well as the PCs. It has also been installed on 40 Pentium PCs in the Weber Lab.

For more information on Java WorkShop 2.0, including how to obtain and intall this product, refer to
	http://www.sun.com/java/


How to Initialize and Open Java WorkShop 2.0

If you are using a PC in the Weber Lab:
If you are using a PC with Java WorkShop 2.0 installed:

Just click on the Java WorkShop 2.0 icon,
    if one appears on the main screen

Otherwise,
  1. Click on Start in the bottom left corner of the screen
  2. Click on Programs
  3. Click on Java WorkShop 2.0

If you are using a Sun workstation with Solaris and with Java WorkShop 2.0:

You must first add a path for jws to your .cshrc file:

  1. From your home directory, edit the file named .cshrc, using the editor of your choice
  2. Add /usr/local/Java-WorkShop2.0/JWS/sparc-S2/bin to your $PATH variable
  3. Save the modified .cshrc file
  4. Type source .cshrc at the prompt

Now your UNIX environment should recognize the jws command and bring up Java WorkShop 2.0 whenever jws is typed at the prompt

You only need to edit your path once for Java WorkShop 2.0
The next time you login, the jws command will automatically be defined by your .cshrc file


How to Start Using Java WorkShop 2.0 (JWS)

Your Personal Java WorkShop 2.0 Files:

If you are using the Weber Lab:

If you are using your own machine:
If you are using a CS 3rd floor Lab machine under your own login name:

Java WorkShop 2.0 Profolios:

A portfolio is a collection of projects, i.e. a superproject
Portfolios are used to organize projects
They can be
And it is possible to move from one portfolio to another

A portfolio file has the file extension .psf
It holds the location of project (.prj) files
    (discussed in more detail below)

You first need to set up a portfolio file for your current task (if you have not already done so)

To create a portfolio:
  1. Click on Project
  2. Click on Show Project Manager
  3. Click on File (of Project Manager)
  4. Click on New
  5. Click on Portfolio
  6. Type a name for your portfolio
      For Weber Lab students:
    • Type C:\Temp\my_projects.psf
  7. Click on Create
The newly-named portfolio is created
It automatically becomes the current active portfolio

When you create a new project having new_project as its name, then a sub-directory new_project is created as well

For Weber Lab students:

Java WorkShop 2.0 Projects:

All Java programs and applets must belong to a project
    (when run within JWS)
A project is a collection of files, including
that are related to a single task or set of tasks
Every program you run using JWS is treated as a project

A project file (with the file extension .prj) stores information regarding the project
It contains data such as

A .prj file is created automatically by JWS whenever you start a new project
This file is place within the current portfolio


Running Your First Java Program

Setting up the project

First you need to set up a new project for your current portfolio:

  1. Start JWS
        (See the text above to learn how to start JWS on your machine)
  2. If you have not already done so, create a portfolio
        (See the text above to learn how to create a portfolio)

  3. Since you are about to start a new project, do the following:
    1. Click on Project on the menu bar
    2. Click on Show Project Manager
    3. You should see something like this
    4. Click on File (of Project Manager)
    5. Click on New
    6. Click on Project
    7. Type the name of your project, say Hello, in place of Untitled1
    8. Click on the radio button adjacent to Standalone
    9. Click on the radio button adjacent to No GUI
    10. Click on Next>
    11. Click on the radio button next to No
    12. Click on Finish

Editing the program

After creating the new Hello project, you should see the JWS main window

The Source Editor is the top frame of this window
This frame holds the Java source code to be edited

The bottom frame contains any messages generated
    when you build (or compile) your project (program)
It plays a role in debugging your program
It is also used when searching for occurrences of words or strings of characters in your program

To edit a program, simply use the mouse and keyboard to modify the text in the Source Editor window

For example, add the following line to the main method of the Hello program:
     System.out.println("Hello World !!!") ;

The modified window should appear as below:

Saving the edited file

  1. Click on File (of the JWS editor)
  2. Click on Save
        or Press Ctrl and S together
        or click on Floppy disk icon  

Compiling the program

  1. Click on Build in the menu bar
  2. Click on Build
        or Press Shift and F8 together
        or click on Tightener icon  

Running the program

  1. Click on Project
  2. Click on Run
        or Press Cntl and F6 together
        or click on Green Right Arrow icon  

  3. JWS will open a window: JavaWorkShop Java Console
    This contains the output of your first java program

Since several files may be related to a particular project, it is best to organize your Java programs
Create a directory for each Java project you undertake
The directory is automatically created by JWS (if asked for), whenever you start a new project

Note:

Any operations, such as Build or Run, affect the currently active project,
even though the file in the editor window does not belong to the currently active project


Working in the Weber Lab

The Java WorkShop 2.0 resides in the C:\jws directory
You do not have permission to save your files in the C:/jws directory on the Weber Lab machines
You have to save them in the C:/Temp directory
    (which is erased when you log off the machine)
Or you can save them on a floppy disk (the A: drive)
Saving Your Work on a Floppy Disk (the A: Drive)
The A: drive is the floppy disk drive

  1. Click on File (of the JWS editor)
  2. Click on Save As
  3. Type a name for your file, starting with A:\
        e.g., A:\my_program.java
  4. Click on Save or Okay
Reading Your Files from a Floppy Disk (the A: Drive)
You can read the contents of your floppy disk into the C:\Temp directory

  1. Click on File (of the JWS editor)
  2. Click on Open
  3. Type the name of the file on your floppy, starting with A:\
        e.g., A:\my_program.java
  4. Click on Open or Okay

Once you have your file in JWS, you are free to modify it as you wish

When you are done, you may resave it on the floppy disk

  1. Click on File (of the JWS editor)
    1. Click on Save
          (this names the file the same as the name of the opened file)
    2. Click on Save or Okay
  2. Or click on Floppy disk icon  
        (this names the file the same as the name of the opened file)


Working on the A: Drive:

You may keep all your files,
  • programs
  • projects
  • portfolios
    on the A: drive
without using the C: drive (other than JWS itself)

Using the A: drive directly provides a method for keeping a copy of all your work
However, reading from the disk and writing onto the disk is little slower
    than using the C: drive

Creating a Portfolio on the A: Drive

Creating a portfolio on the A: drive is much the
    same as for the C: drive

  1. Click on Project
  2. Click on Show Project Manager
  3. Click on File (of Project Manager)
  4. Click on New
  5. Click on Portfolio
  6. Type A:\my_projects.psf
  7. Click on Create

This will automatically become the current active portfolio

When you create a new project the name new_project,
    a sub-directory new_project is created on A:\
All subsequent files you save (related to this project) are saved in A:\new_project

Opening and Using a Portfolio on the A: Drive

When you want to open a portfolio from the A: drive, do the following

  1. After opening JWS, click on Project
  2. Click on Show Project Manager
  3. Click on File
  4. Click on Add
  5. Click on Portfolio
  6. Type A:\my_projects.psf

This will be the currently active portfolio

Now you can either start a new project in this portfolio
    or work on an already existing project

To activate an already existing project,
    double click on that particular project


Using the U: Drive

The Weber Lab also has a U: drive, which is a network drive

Files stored on the U: drive are accessible to any other machine in the Weber lab
  • Any student can write files to this drive
  • Any student can read files from this drive

The U: drive is formatted every Friday at 5:00 PM
    Thus all U: drive files are lost after 5:00 PM every Friday

The best thing is to work on the C: drive in the Temp directory
  • Create a subdirectory for yourself in the C:Temp directory
  • Save your files in that directory
  • When finishing your JWS session,
        save the contents of your session onto A: drive (or floppy)
  • The next time you start a new JWS session,
        copy the files from the A: drive back into the C:Temp directory